Maximizing Firefly Spawns
Queue for the Spaceport Hidden Bunker event and run a full 40-minute rotation to maximize firefly spawns and stack Damage Fireflies with Damage Flying Arc at once.
Fireflies are the rarest ARC flyers on Spaceport — far fewer spawn than hornets or wasps, and they do not get summoned by snitches, so timing and route matter.
Best zone and route:
- Focus your loop around the Arrival building and the Trench Towers; those areas see the densest firefly activity.
- Build a zipline shuttle between South Trench Tower and Arrival Building for consistent, stamina-free travel. Because traversal won’t drain stamina, prioritize the blue shield over green for loadout choices.
- From rooftop positions you can get immediate sightlines on spawn nodes as they pop — use them to claim kills before ground players react.
Spawn cycle and spawn points:
- Cycle roughly five spawn nodes in sequence along the Arrival–Trench corridor to keep consistent pressure: the central triple-node, the outside wall node, the launch pad node, and the roaming spawn that patrols the Arrival side.
- After each cycle, clear any hornets roosting on spawn nodes — they can prevent the next firefly from spawning if left in place.
Weapons and tools:
- Use a high-precision snipe weapon (Jupiter recommended) from rooftops to safely and quickly finish fireflies the instant they appear.
- For the Damage Flying Arc objective, bring snitch scanners (farm them in advance) so you can call enemies for extra flying-arc damage.
- Seeker grenades or Wolf Packs are effective to finish called-in hornets and wasps; Wolf Packs are especially handy vs rocketeer enemies that stall your cycle or to blow up a last-second firefly as the gate closes.
Priority and player interaction:
- Expect other players to be farming the same trials; they’ll go after the same fireflies. Decide whether you’re chasing pure firefly damage (call and take targets fast) or balancing both trial scores.
- Communicate your priority if you can — quick, decisive targeting of a firefly is usually necessary to secure it.
Extract coordination:
- Coordinate extraction timing with nearby runners — don’t let others hit extract early. Every extra full minute can give you roughly two additional fireflies, which translates to about +1.7k damage.
- Keep an eye on the Events page to track the run and ensure you’re getting credit for both trials.
Quick tactical checklist:
- Queue during Hidden Bunker on Spaceport.
- Run full 40 minutes.
- Use zipline train S. Trench Tower ↔ Arrival Building.
- Rooftop snipe (Jupiter) for first-looks on spawns.
- Cycle ~5 spawn nodes around Arrival–Trench corridor.
- Clear hornets on nodes between cycles.
- Bring snitch scanners + seekers or Wolf Packs for Flying Arc requirements.
- Decide priority and call shots.
- Coordinate extract timing to squeeze extra spawns.
Memorize the fixed firefly spawn points — they appear in the same locations each cycle, and learning them is the largest skill gain for this trial.
Fireflies only spawn naturally; they are not attracted by snitches, so you cannot force them to appear like some other enemy types.
Hornets can sit on spawn nodes and prevent a firefly from spawning that cycle; clear any blocking hornets with a couple quick shots and keep moving.
This strategy favors long-range sniping from elevation — use the Jupiter and avoid close-range anti-vehicle weapons like the Hullcracker in this loadout.
Spawn timing is unreliable: nodes may skip a cycle or spawn a hornet instead of a firefly. If a node doesn’t produce, don’t wait around — rotate to the next one.
Each firefly deals about ~880 damage; with roughly five nodes active per cycle across a run, capturing as many spawns as possible separates a ~20k run from a 28k+ run.
Hidden Bunker is an event modifier on Spaceport (not a separate map). Its 40-minute window increases the number of cycles you can farm compared with shorter events.
The arrival building and trench tower area contain the densest, most visible set of firefly nodes within range of a two-point zipline route — ideal for staying elevated and efficient.
Use the two-stage zipline to chain vantage points and minimize ground travel while maintaining line-of-sight to multiple nodes.
Run Spaceport during Hidden Bunker when available; check the events page to catch the window.
When Hidden Bunker is active the weekly “damage flying arc” trial inside Spaceport walls runs with the same 2x multiplier — kills inside count for both trials.
Buried City is a solid alternative for the damage flying arc weekly due to good arc density, but it lacks a long Hidden Bunker-style event, so expect fewer total cycles.
Bluegate is viable but requires more movement between visible spawns since fewer nodes are reachable from a single elevated position.
Practical tips: learn node patterns, clear hornet blockers immediately, don’t camp empty nodes, stay on the zipline loop, and prioritize uptime on sightlines to maximize spawned kills.
With practiced routes and consistent node captures, solo runs can reliably climb from mid-20k into the 28k+ range.
Game Strategy Overview
Start by grabbing high ground on the zipline train that runs between the south trench tower and the arrival building — all key spawns sit inside the spaceport walls and elevated sightlines let you react faster than ground players.
Expect roughly 880 damage per Firefly; many opponents will be watching rooftops too, so secure elevation early.
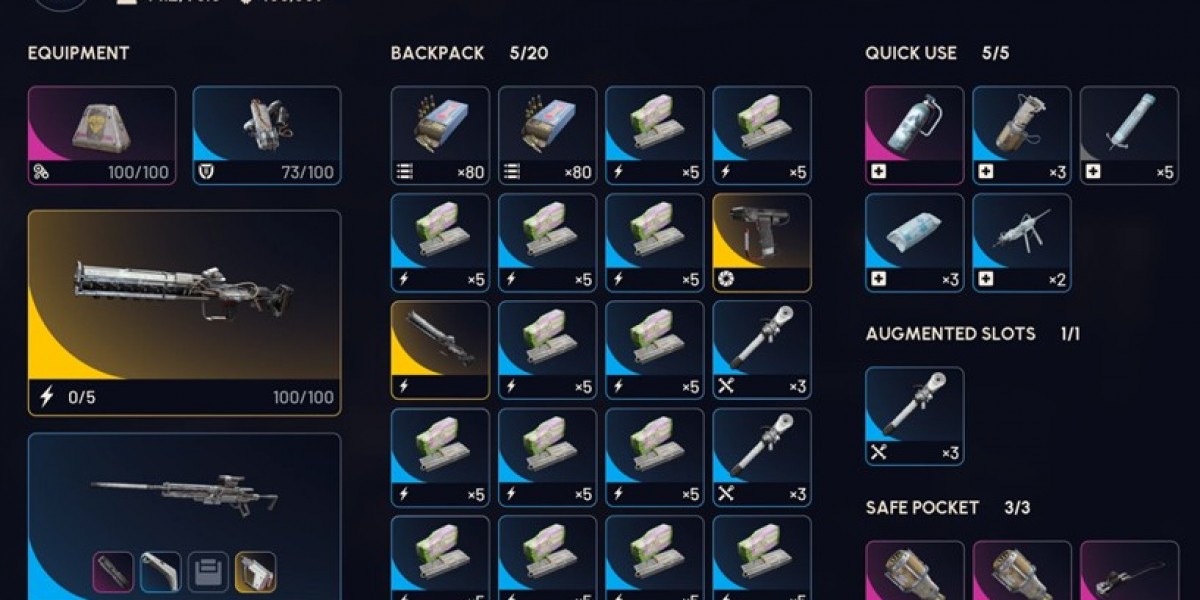
Loadout priorities (why and how many):
- Survivor perk: extra carry space for more ammo and consumables; lifesaver if you get knocked and a friendly can rez you.
- Blue Shield: extra bulk to survive hits while you position; you’re using ziplines so green’s mobility bonus isn’t necessary.
- Jupiter ×3 (primary): long-range precision tool to pick off Fireflies at distance and tag enemies across the corridor. You’ll likely use ~1.5 mags in practice—three is backup ammo.
- Osprey (secondary): pull aggro at range or finish close targets quickly when they get into the arc.
- Photoelectric Cloak: panic button to break heavy aggro or escape a locked-on rocket—cloak, reposition, and avoid wasting heals in bad spots.
- Wolf Packs (several): demolish rocketeers that stall your cycle and serve as an instant nuke for last-second kills; seeker grenades are a viable alternative for quick arc cleanup.
- Snitch Scanners: farm before the run and bring them in to call hornet packs intentionally—kill them fast with wolf packs/seeker grenades to gain flying arc trial progress.
- Ziplines ×4: build the south trench tower → arrival train route; carry an extra for whatever extract direction appears.
- Snap Hook: fast, close-range repositioning tool to reach elevated spawn points immediately from your spawn.
- Adrenaline Shots (two stacks): have a full stack ready for bad spawns that force a long sprint to the arrival corridor; afterwards keep them for emergencies only.
- Herbals + Vitas Spray: herbals to add arc damage, vitas spray to efficiently top off the last 10–15 HP without wasting larger heals.
Tactics: get the zipline network up ASAP, hold the corridor between the south trench tower and arrival building, use long-range picks with the Jupiter and finish with wolf packs/seeker grenades when time is tight. Secure height early, use cloak to escape bad engagements, and rely on extra ammo/heals from Survivor to outlast mistakes.
Optimal Spawn Strategy
A trio appears at the central node — the corridor’s highest-value spawn.
Three fireflies show up in the middle of the passage each cycle.
This triple spawn is the most profitable event, roughly worth 2,600 points by itself.
Prioritize it; missing this cycle loses a large portion of your income.Once the arrival-side nodes are cleared, take a short detour.
A single firefly appears on the outside of the spaceport wall, partially obscured by the structure.Initiating engagement protocol:
Identify primary launch zone coordinates.
Visual confirmation is viable from elevated positions.
Include this sector in routine corridor clearance operations.Navigating the firefly trial requires precision in spawn management
Watch for roaming spawns on the arrival side, as their patterns can shift unexpectedly
If a hornet appears where a firefly should be, the cycle for that location has already concluded
Hornets occupying a spawn node will prevent the next firefly from emerging there
Dispatch them swiftly between cycles with minimal engagement to clear the path
A complete demonstration covers zipline configuration, spawn rotation, and target isolation within groups
Review the final map overview to understand each spawn point and the optimized traversal route
We extend our appreciation to valliate for the visual reference
Prepare your strategy, monitor the spawns closely, and aim for a smooth extraction
Visit our community hub to discuss achievements and strategy refinements
Share your personal records and exchange route insights with fellow participants on our Discord server
About the ARC Raiders Steam and Steam ReView
arc raiders thrusts players into a high-stakes, third-person extraction adventure set on a future Earth dominated by relentless ARC machines. Each session challenges you to scavenge resources, upgrade gear, and make critical decisions as you face both hostile enemies and rival raiders in dynamic environments. The game’s mix of cooperative play and intense PvPvE encounters creates a tense atmosphere where every choice matters. According to Steam reviews, arc raiders impresses with its immersive visuals and tactical depth, though the risk of losing hard-earned progress adds an extra layer of challenge that fans find exhilarating.
What is the ARC Raiders Steam key?
The ARC Raiders Steam key is a digital code used to unlock and access the ARC Raiders game through the Steam platform. By redeeming an arc steam key, players can add ARC Raiders to their library and enjoy its sci-fi shooter gameplay without needing a physical copy. This convenient method allows gamers to experience ARC Raiders instantly by activating the code in their Steam account. The ARC Raiders Steam key is essential for those who want quick and secure access to the game online.
How to buy ARC Raiders Steam key on LootBar?
- Go to the official LootBar.gg website and log into your account, or create a new one if you’re not registered yet.
- Navigate to the top menu and select “game keys,” then locate ARC Raiders Steam among the available titles.
- Choose the specific game key for ARC Raiders Steam that you want to purchase.
- Click on “Buy Now,” pick your preferred payment method, and proceed to confirm your payment.
- Enter any necessary information requested by the platform and wait for your ARC Raiders Steam key to be delivered.
Following these steps makes it easy to buy ARC Raiders Steam key on LootBar, ensuring a secure transaction and prompt delivery so you can activate and play ARC Raiders through Steam right away.
What is the best Gaming Top-Up Platform?
As a trusted choice for gaming top-up, LootBar offers both top speed and affordability. The platform has earned a reputation as the best platform for gaming recharge, supported by outstanding customer feedback—4.9/5.0 on Trustpilot.